1 min read
ERP vs. WMS: What’s the Difference and Which Do You Need?
For many inventory-driven businesses, the warehouse and finance team work from different systems. The warehouse knows what was received, picked, and...
4 min read
Warehouse picking and packing works fine when order volume is manageable. But as operations grow, small errors begin to create larger problems, from slower fulfillment and incorrect shipments to more time spent correcting mistakes.
That is usually when businesses start looking for more structured warehouse processes and barcode-driven picking tools.
Acumatica WMS helps automate picking, packing, and shipping so teams can improve accuracy, fulfill orders faster, and reduce manual work.
Most warehouse problems do not begin with a major failure. They build gradually as order volume increases and manual processes stop keeping pace.
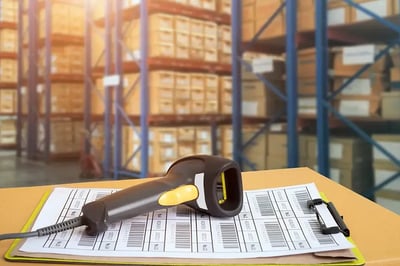
Paper pick lists create room for error from the moment they are printed. A picker may pull from the wrong location, misread a quantity, or select the wrong product, and the mistake may not be discovered until the shipment is already on its way to the customer.
Even a small error rate can add up quickly. At a 1% picking error rate, a warehouse processing 1,000 picks could be dealing with 10 errors that require correction, reshipping, or customer service.
Manual processes also slow teams down. Workers spend time cross-checking lists, searching for items, and resolving discrepancies instead of moving orders through the warehouse. As volume grows, labor costs increase and fulfillment takes longer.
Barcode scanning and verification help reduce those errors by confirming the item, location, and quantity before the order moves to packing.
The result is fewer preventable mistakes, faster fulfillment, and a warehouse that is easier to manage as order volume increases.
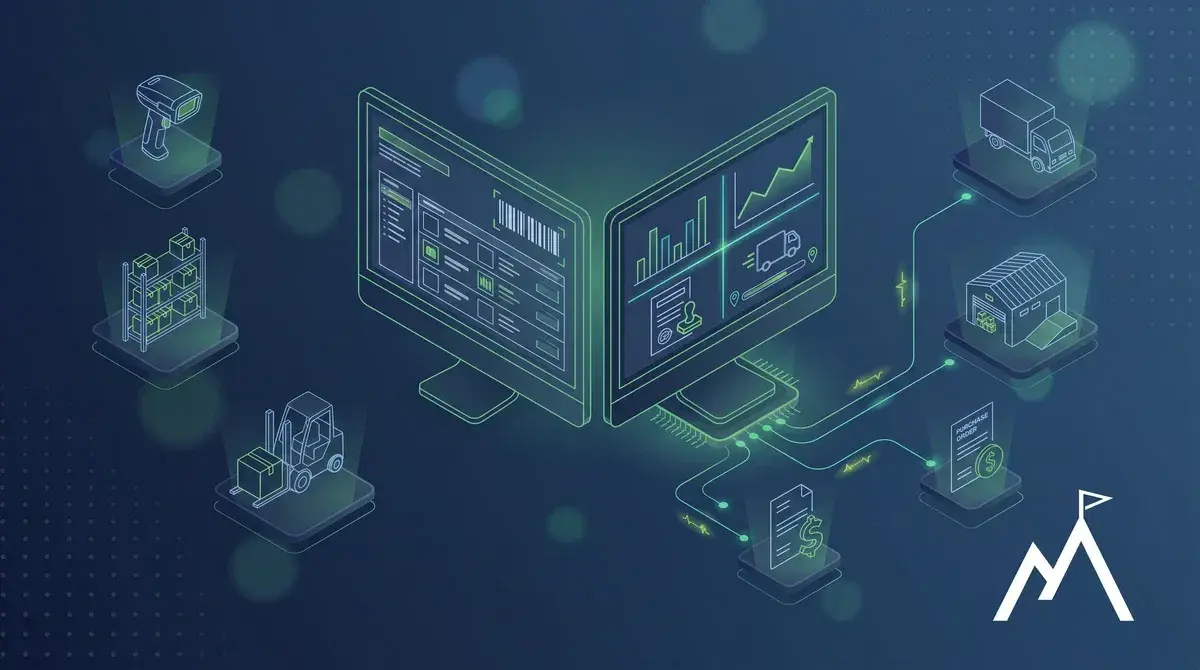
Acumatica WMS connects picking, packing, and shipping with inventory, purchasing, sales, and financials inside one ERP system.
Instead of relying on paper lists and manual entry, warehouse teams use mobile devices and barcode scanners to move through each step of fulfillment. The system tracks what has been picked, packed, and shipped in real time, helping inventory stay accurate and orders move faster.
Because warehouse activity is built into the ERP, there is no separate system to maintain or synchronize. Inventory balances, order status, and shipping confirmations update automatically as work is completed on the warehouse floor.
When a sales order is ready to pick, Acumatica generates a pick list based on the required items, quantities, and warehouse locations. Workers can access the list from a mobile device or handheld scanner.
The picker scans the warehouse location, the item, and the quantity as work is completed. Acumatica validates each scan in real time and flags discrepancies before the order moves forward. This scan-based process removes much of the guesswork and helps catch mistakes before they become shipping problems.
Once picking is complete, the worker switches to pack mode within the same Pick, Pack, and Ship application. The system displays the items that were picked for the shipment and guides the worker through the packing process.
The worker scans the box, scans each item being packed, and confirms the quantity. If the shipment requires multiple boxes, each package is registered separately, and the weight can be recorded for each one. Once packing is complete, the shipment is confirmed and moves to the shipping stage.
The entire process takes place on the mobile device without paper lists, manual data entry, or switching between separate systems.
For warehouses handling higher order volumes, Acumatica supports several picking methods that help reduce travel time, process more orders, and make better use of warehouse labor.
Wave picking groups orders based on criteria such as ship date, carrier, or product type. This helps teams organize work around shipping priorities and process related orders together instead of handling each one separately.
Batch picking allows workers to pick items for multiple orders during the same pass through the warehouse. This reduces repeated trips to the same locations and helps teams complete more picks in less time.
Zone picking divides the warehouse into assigned areas, with each worker picking only the items located within their zone. In larger facilities, this can reduce travel time, keep workers focused, and allow multiple parts of an order to be picked at the same time.
Each method works with Acumatica’s barcode-driven picking process, allowing warehouses to choose the approach that best fits their layout, order volume, and fulfillment needs.
Moving from paper-based picking to barcode-driven processes improves more than order accuracy. As order volume increases, small mistakes and inefficient steps start to add up, creating friction across the fulfillment process. A warehouse management system helps reduce that friction throughout picking, packing, and shipping.
Each scan validates the item and quantity before the pick is confirmed, so mistakes can be caught in the aisle instead of becoming returns, reshipments, or customer service issues.
System-guided picking gives workers clear instructions on what to pick, where to go, and how many units to pull without relying on paper lists. Teams spend less time searching for locations, retracing steps, or manually checking orders.
Inventory updates as items are picked, packed, and shipped. Records stay closer to what is physically available, helping reduce stock discrepancies, unexpected stockouts, and time-consuming reconciliation.
More efficient pick paths and batch or wave picking help teams complete more orders with the same staff. Workers spend more time moving product and less time walking, waiting, or correcting mistakes.
Inventory, order status, and shipping activity update in the same system. Warehouse, operations, sales, and finance teams can work from the same current information, making it easier to plan fulfillment and understand what is happening across the operation.
As order volume grows, these improvements make the warehouse easier to manage without adding more manual work or sacrificing order accuracy.
Watch this quick walkthrough to see how picking, packing, and shipping work inside Acumatica.
Not every warehouse needs a full WMS right away. Simpler operations with lower order volumes and fewer SKUs can often manage with basic inventory tracking.
A WMS usually starts to make sense when manual processes are creating regular errors, multiple warehouse locations make inventory harder to track, fulfillment speed becomes more important, or inventory discrepancies create extra work for finance at month-end.
At that point, the question becomes which WMS best fits the way the warehouse operates and how well it connects with the rest of the business.
For a closer look at how ERP and WMS compare, read the ERP vs. WMS guide.
If picking errors, fulfillment delays, or inventory discrepancies are creating more work for your team, Acumatica WMS may be worth considering.
For a broader look at how warehouse activity connects with inventory across your operation, visit the Acumatica Inventory Management Software page.
1 min read
For many inventory-driven businesses, the warehouse and finance team work from different systems. The warehouse knows what was received, picked, and...

1 min read
Most manufacturers don't struggle with inventory because they're doing something wrong. They struggle because the business grew past what the current...

1 min read
Updated: July 2026 Managing inventory gets harder as a business adds more products, locations, warehouses, and sales activity. Stock levels need to...